22 December 2011

PALEO MINCE PIES


Christmas.....its a great time of year in many, many ways.....except if your trying to eat Paleo. I personally have had a bit of a nutritional nightmare this month. Work parties, Christmas parties, alcohol and temptations of junk food everywhere to be seen. Its time to get back on track with a great recipe of the paleo way that fits into the seasonal spirit.

I took inspiration of this recipe from a few different locations....unsure originally if l should push the boat out and make a mincemeat stuffed dark chocolate christmas pudding. After seeing how these came out l was perfectly happy with my contribution to Christmas! 

I was pretty impressed with the look of these when they came out, l have been experimenting this week with different pastry casings for this recipe, this one was by far the best for taste and asthetics after cooking. I found this pastry recipe on the Crossfit Tameside thread, the filling kind of made itself, but inspiration taken from the steamed Christmas pudding recipe on the BBC FOOD website from a few years back with a few additions of my own for what I wanted them to deliver. (obviously without the alcohol too)

The ingredients for a dozen mince pies are as follows;

THE FILLING

3/4 cup mixed raisins and saltanas
1/2 cup of figs
1/2 cup of suet *see notes below on suet
Zest from 1 lemon
Zest from 1 orange
1 tablespoon cinnamon
1 tablespoon of agave nectar
1 apple
1 pear

THE PASTRY

2 cups of almond flour
2 egg whites
A sprinkle of cracked salt
1 teaspoon of vanilla flavoring

Optional - handful of flaked almonds to decorate

* Suet is a very hard animal fat, taken from around the kidneys of cattle, and usually shredded. It has a high melting point, which gives a unique lightness to pastries and sponges.

You can buy fresh suet from a butcher, but these days the suet 'knobs' are usually removed from a carcass after slaughter, so no longer arrive at the butcher attached to the kidneys, so you'll need to order ahead. It is worth it, though, not least because it will be unprocessed and traceable. (If your butcher sells organic beef, they should be able to get you organic suet, too. Your butcher may be happy to shred it for you; if not, just grate it yourself on a cheese grater. Fresh suet has a dry, almost crumbly texture and a slightly meaty smell. It contributes a distinct richness to sweet dishes, and won't make your roly poly taste of beef.

Packaged meat suet is a fairly unprocessed product. It's made by melting down fresh suet, then extruding it into pellets. Most packaged suet sold in the UK comes from Irish cattle. Given the option, get from your Butcher to ensure quality!

THE FILLING

STEP 1 - pre heat your oven to 120 degrees

STEP 2 - finely slice up your apple and pear, leaving the skin on. Once sliced place them into a large pan that we can put into the oven once all of the ingredients are mixed together.

STEP 3 - slice up your figs, grate your zest from the orange and lemon adding them to the same pan along with the cinnamon. Mix all of these dry ingredients together in the pan.

STEP 4 - add the suet and mix it through the ingredients you have in the pan already so that it is evenly distributed throughout.

STEP 5 -  Place some tin foil on top of the pan to seal it loosely before placing in the oven for around an hour. We're after the ingredients being "tacky" when they come out so they have just broken down a little. We dont want they to be totally reduced as we will be doing something similar in a later step.

STEP 6 - once your pan is in the oven, place your 2 cups of ground almonds into a mixing bowl. Create a small well in the middle then seperate and add your two egg whites to the middle of the well, also add the vanilla and the pinch of salt. Mix this thoroughly until you get a form of paste. If this appears too sloppy add a little more ground almonds until you have a more cohesive mixture. 

STEP 7 -  put down a sheet of greaseproof paper, put your pastry on top. Put a sheet of greaseproof paper on top of the pastry and start to roll it flat. You dont want this too thin as it will simply break when you try to roll it. Use your judgement, but its best to have a thickness of around 1/3 of an inch if not more.

STEP 8 - put this in the fridge to chill for around 15 mins and you will find that it becomes a little easier to shape and manage in the next stage. Take this chance to check on your filling thats in the oven, stir it all up in the pan and make sure the fruit is becoming tacky.

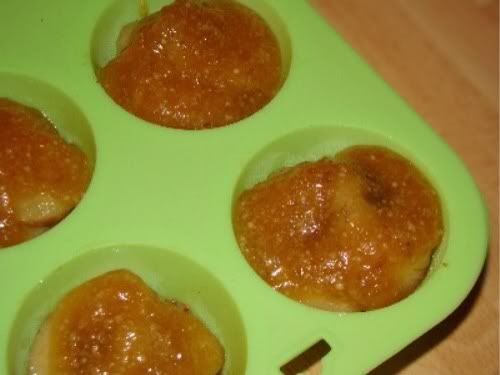
STAGE 9 - Get a bun tray out and melt a tablespoon of coconut oil in a cup in your microwave. Then using a brush, grease the individual bun tray spaces to ensure your not fighting with a mince pie once they are cooked.

STEP 10 - Once your pastry has had time to rest, remove it from the fridge and cut it into circles with a cutter....or if your common like me use the mouth of a glass or cup. Cut out as many as you can with the pastry that you have, you want to have two circles for each pie. Once youve exhausted how many pastry circles you can cut out, roll the excess up and flatten it again. Youll find you will get a few more circles by doing this. DONT MOVE THESE FROM WHERE YOU HAVE CUT THEM, THE MORE THEY ARE MOVED, THE WORSE THEY WILL LOOK. BE PATIENT AND KEEP THEM THERE FOR A FEW MINUTES

STEP  11 - one at a time, lift up your circles from where they have been cut with a sharp wide flat knife blade below them. Place one circle in each of your bun spaces on the greased tray. Once you have 12 lined up leave everything where it is until your hour for the filling cooking is up. If this is a while away, put the pastry circles in the fridge to prevent them breaking down and being unworkable when you need them to be.

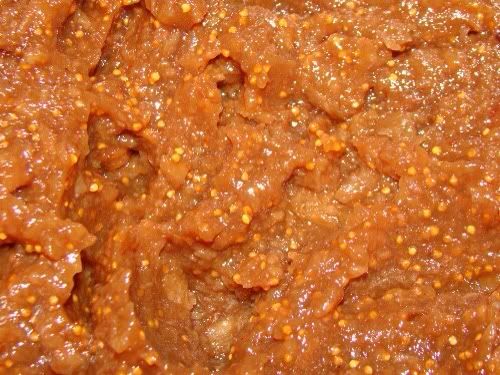
STEP 12 - once your filling has had the hour to cook, remove it from the oven and place it into a food processor. It should be looking something like this, just starting to break down and sticky.


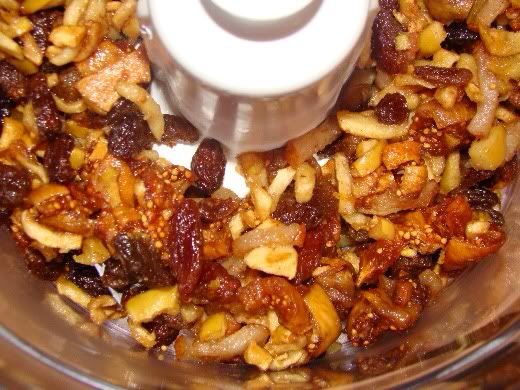
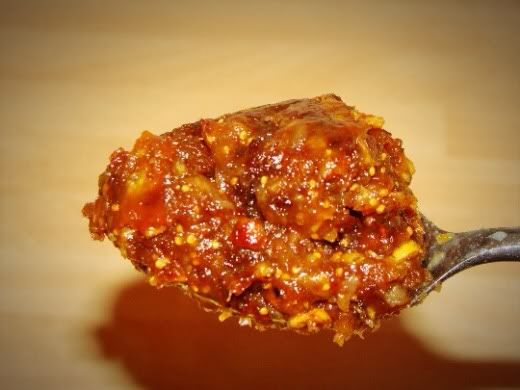
Obviously make sure that it has a moment to cool and is not placed into a sealed food processor. Blend the mixture until it looks something like this. When it gets to this stage, add the agave nectar and a tablespoon of water to the mixture before blending together a little more. Your ideally after something that looks like this


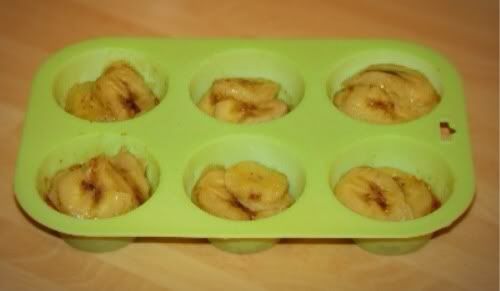
STEP 13 - spoon your filling into the 12 pastry bases generously. Your able to heap this in as the lids that you add will bend over the mixture for you to seal at the edges nicely. 

STEP 14 - once all of the cases have been filled, apply the 12 pastry lids. Lightly dab the sides where the bottom base and lid join to seal up the pie and allow the insides to stew during cooking. 

STEP 15 - score the pastry or decorate as you see fit at this point. I did a little knife work on the top and sprinkled some flaked almonds.


STEP 16 - Cook at 175 degrees for 15/20 mins until pastry is golden. This cooking time all depends on the thickness of the pastry you have used. Keep an eye on them, checking every 5 mins for the first 10 mins, then every few minutes as cooking gets later.

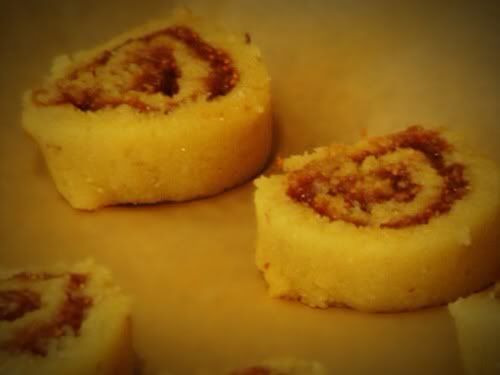
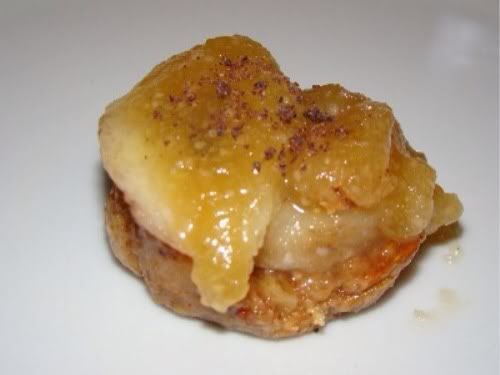
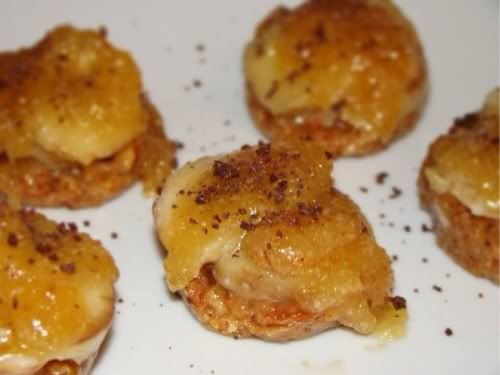
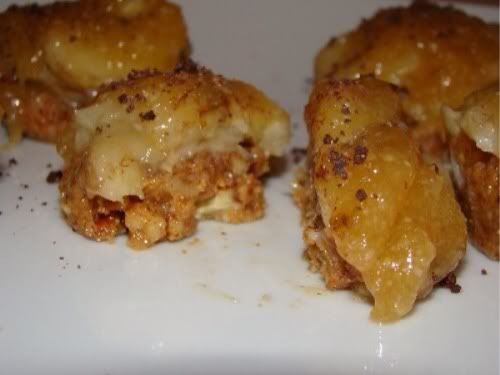
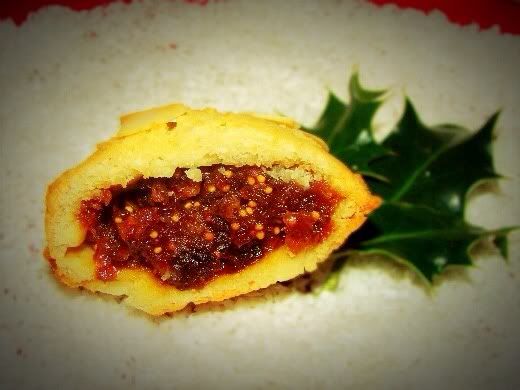
STEP 17-  ...tuck in and have a taste

As you can see mine came out pretty well...


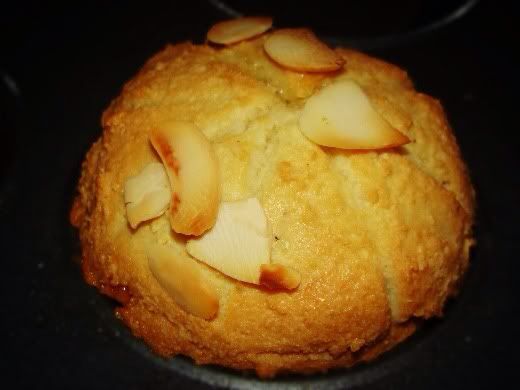
I was really chuffed with how these came out. The almond pastry is something that l will use again for other recipes, making tarts with some fruit filling for example. The slight crumble of the sweet pastry is great, but even better when you get to that warmed fruit filling. Add to that the differing textures of the fruit and the little fig seeds that you find and its pretty damn good food!

If you need something to accompany this, you could always freeze some coconut milk with some vanilla pods in to make a little make shift ice cream.

Heres wishing you a Merry Christmas from Primal Provenance, the blog is now 2 months in and gathering viewing pace by each day. I just want to take this opportunity to thank you for viewing the blog, l hope that it has bought you as much pleasure cooking the recipes as it has for me creating them. 

14 December 2011

PALEO FIG WHEELS


The wheel, something that the cavemen were renound for coming up with....and given how good this recipe tastes, it deserves to share the title! 

I always try to experiment with quite differing paleo treats, that offer a new and different taste experience....this one doesnt disappoint! Ive never even tried figs before this recipe, but loved the stickiness of them once they were cooked and the texture with the little seeds that you discover in each bite. 

The almond dough offers a soft, crumbling, sweet taste to the recipe when baked. When this is mixed with the sweet taste of the figs its an absolute winner.

The ingredients for around 15-18 paleo fig wheels are as follows;

SWEET ALMOND DOUGH
3 cups of ground almonds
2 eggs
1/2 cup of pure maple syrup
1/2 teaspoon of vanilla extract
1/2 teaspoon of almond extract
1/2 cup of coconut oil

FIG FILLING
1 cup of figs
1/2 cup of cranberry juice
1 teaspoon of agave nectar

BE AWARE THAT SOAKING THE FIGS IN STEP ONE REQUIRES AT LEAST AN HOUR, THIS CAN HOWEVER BE LEFT FOR LONGER...

FIG FILLING

STEP 1 - slice up your cup of figs and add them to a bowl with the cranberry juice. Place in the fridge and leave for an hour.

STEP 2 - Once the hour has passed, heat up a saucepan and cook your figs/juice combo at a temperature that allows it to gently bubble. You are looking for the figs breaking down a little and becoming softer. I did this on a moderate heat for around 10 mins, checking constantly.

STEP 3 - allow a little time for your figs and juice to cool before putting it into a food processor. This is where we blend the mixture to make our smooth filling. Pulse until you cannot see any parts of fig and it is more of a paste. Whilst this is taking place add a teaspoon of agave nectar to the bowl and allow it to mix in thoroughly. You want it to look something like this...


STEP 4 - Now into a fresh bowl,  add your eggs, maple syrup, vanilla and almond extract. Mix this well with a hand whisk. Add you ground almonds to this and again mix until it becomes one.

STEP 5 -  melt your coconut oil and add this to your mixed almond dough, again mix it all together until its one. 

STEP 6 - The dough will seem a little too loose at this point, dont worry its meant to be like that. If its not looking right at all it may be that youve got too much liquid in there, from larger eggs for example. Its not a problem, just add a little more ground almond to the mix to thicken it up. Bear in mind for this recipe to work you need to roll this dough up like a swiss roll.

STEP 7 - put down a sheet of greaseproof paper, put your dough on top. Put a sheet of greaseproof paper on top of the dough and start to roll it flat between the two. You dont want this too thin as it will simply break when you try to roll it. Use your judgement, but its best to have a thickness of around 1/3 of an inch. 

STEP 8 - Once this has been rolled out flat, leave it between the sheets and put it into the freezer for 30 mins to an hour to bind together. This may seem like a pain, but believe me its easier than trying to roll dough thats not set and is going everywhere.

STAGE 9 - after the time in the freezer remove the top sheet of greaseproof paper from your dough. Turn it over onto a breadboard/silicone sheet then peel off the other sheet of the greaseproof paper. 

STEP 10 - Go back to your fig mixture and spoon it all over your almond dough in a generous layer. Make sure your not TOO generous as you wont be able to roll it up properly.

STEP  11 - GENTLY roll your dough with fig filling up on itself like a swiss roll. It should look something like this...


STEP 12 - Turn on your oven to 190degrees at this point, get out a further sheet of greaseproof paper and a baking tray. 

IRONICALLY....STEP.....13 - now....with a sharp knife....slice your long roll into individual 1 inch or more thick wheels. I can safely say that after all of the effort l had gone to with this it was like l was slicing on the Masterchef Final !!! What l would say is that this mix makes alot of wheels, so dont worry if your first few come out a little squashed. The trick is to use a sharp knife and to use long strokes to cut. If you saw at it, you will end up with something that resembles a Figgy Frankenstein which doesnt have the appeal of the finished article that l got (after practice). Hopefully they look like this....


STEP 14 - Once sliced, space out evenly onto your taking tray thats lined with the greaseproof paper. Put into the oven thats pre heated and allow to cook for around 10-15 mins or until golden brown. They cook so quickly that l (sadly) sat and watched them through the oven door to make sure that they didnt burn. The cooking time depends on the thickness of the wheels that you have cut, if your more comfortable take the temp down to 150 and allow it to cook for longer. Just be aware that this MAY effect the end visual result with the risen edges of the cooken dough and the figgy troughs (yum, yum) 

STEP 15 - tuck in and have a taste

This recipe requires a little prep, with soaking the figs and allowing the dough to bind together in the freezer but the results are well worth it. You can obviously change the fruit filing to something like apples or strawberries to mix the taste up, but l have to admit im now a fan of the fig!

Yet again another little recipe that can go into your paleo lunchbox for those busy people commited to the paleo journey. A fantastic find in the awesome book MAKE IT PALEO by BILL STALEY and HAYLEY MASON (with a few little changes.)


05 December 2011

BANOFFALEO TARTS


Banoffee....its my nemesis. I love it and hate it in the same breath....Achilles had his heel, Superman his Kryptonite.....this is mine! I cant get enough of Banoffee pie when l have a cheat day and when im on a stint and see one....it ruins me everytime. I love it when you can take a recipe like that and adapt it to Paleo. Obviously bear in mind however, that this is a treat and is for moderation!

I thought that tarts rather than a slab of it in a cake tin were a good way of portion controlling. Ideal to prevent that "one more piece" scenario that l KNOW we have all been in at some point. This recipe is inspired by photos that l recently came across on Caveman Cuisines Facebook page...take a look at this when you get the chance, there are some great recipes!

Here it goes, the ingredients for 8 BANOFFALEO tarts are as follows;

THE BASE
1/2 cup pecans
1/3 cup walnuts
1/3 cup ground almonds
2 tablespoons of agave nectar
1 tablespoon coconut oil

THE FILLING
2 bananas

THE CARAMEL
2 tablespoons of agave nectar
1 teaspoon of vanilla flavoring 
1.5 tablespoons of ground almonds

THE BASE

STEP 1 - Place your measured out pecans and walnuts into a blender and pulse until they are roughly cut. You do not want the pieces to be too small as you want the base to bind together quite solidly. For a guide at getting this right see the picture just below.


STEP 2 - heat up a pan then add the coconut oil and allow it to melt into a liquid. Once this has happened add the 2 tablespoons of agave nectar.

STEP 3 - Once the mixture in the pan is lightly covered in the liquid, then add the ground almonds and mix it all together whilst continuing to simmer over a lower heat. This should begin to clump togther, there will be a noticable change in how sturdy the mix is. Once this is mixed in empty the contents into a glass bowl.

THE FILLING

STEP 4 - get a frying pan, add a little coconut oil and heat whilst cutting up your 2 bananas for your filling. You want to heat the pan to gradually get to a temperature where you get a little "sizzle" as you place the banana pieces in. 

STEP 5 - Whilst the banana pieces are lightly frying in the coconut oil, go back to your previous mixture that is in the glass bowl. Using a silicone bun tin divide your nut base mixture out so that you have around a cm in the bottom of each bun section. You want the base to be thick as this is what is going to hold everything together. Once this is done place the bun tray into the freezer to allow the base to set.


STEP 6 - continue to cook your banana pieces until they appear mushy, literally just holding themselves together.

STEP 7 - by the time that your banana has cooked to the point of being the desired consistency, your base would have set in the freezer. Remove the base and place your nice sloppy banana pieces into the moulds on top of the set bases generously. When you do this put 2/3 pieces of the cooked banana to the side in a dish and we will come back to them shortly.


STEP 8 - place your bases with the banana's in into the fridge.

THE CARAMEL

(This stage was an utter experiment....the caramel is usually made using butter, even in the paleo world, but l wanted to try and avoid it.)

STAGE 9 - into a frying pan, add the 2 tablespoons of agave nectar and the teaspoon of vanilla. Heat this over a gentle flame for a few minutes until it begins to lightly froth or bubble. When this starts to take place chuck in your pieces of banana that you put to the side in the dish and add your 1.5 tablespoons of ground almonds. Get a fork, then whilst mixing in the ground almonds mush the banana down into the mixture, do this until it is literally non existent in the pan and has total blended in with the other ingredients. I left this over the heat, continually mixing with my fork until it became almost foamy and was very light. When it gets to this stage take it off the heat.

STEP 10 - remove your moulds from the fridge and LOVINGLY add around a teaspoon of the caramel to each of the moulds coating the banana. This is an extremely satisfying stage of the recipe....it...looks...awesome! Once you are happy that you have coated the pieces, place it all into the fridge and leave it for over an hour so that it can set properly. You will know if you have not left this for long enough as the caramel will still be runny, you want it so that its thick so that when you go to pop out each of the tarts they come out intact. Get this right and the caramel that you have made should be the same texture as tarmac in the summer heat!


STEP 11 ... tuck in and have a taste!

As you can see mine came out pretty well, decorated with a light sprinkle of grated dark chocolate!


There isnt really any prep time for this recipe, but it does take a few steps, pans and dishes to produce. I would say that this took me about 20-25 mins to create in total from start to finish.

If your a fan of sweet things and follow the Paleo way, this is a MUST recipe for you to try. It combines to make a real sweet dish that satisfied me on many, many levels. I hope you enjoy this....l know that l certainly did.