Banoffee....its my nemesis. I love it and hate it in the same breath....Achilles had his heel, Superman his Kryptonite.....this is mine! I cant get enough of Banoffee pie when l have a cheat day and when im on a stint and see one....it ruins me everytime. I love it when you can take a recipe like that and adapt it to Paleo. Obviously bear in mind however, that this is a treat and is for moderation!
I thought that tarts rather than a slab of it in a cake tin were a good way of portion controlling. Ideal to prevent that "one more piece" scenario that l KNOW we have all been in at some point. This recipe is inspired by photos that l recently came across on Caveman Cuisines Facebook page...take a look at this when you get the chance, there are some great recipes!
Here it goes, the ingredients for 8 BANOFFALEO tarts are as follows;
THE BASE
1/2 cup pecans
1/3 cup walnuts
1/3 cup ground almonds
2 tablespoons of agave nectar
1 tablespoon coconut oil
THE FILLING
2 bananas
THE CARAMEL
2 tablespoons of agave nectar
1 teaspoon of vanilla flavoring
1.5 tablespoons of ground almonds
THE BASE
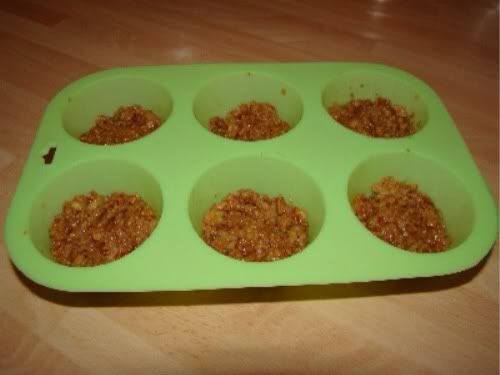
STEP 1 - Place your measured out pecans and walnuts into a blender and pulse until they are roughly cut. You do not want the pieces to be too small as you want the base to bind together quite solidly. For a guide at getting this right see the picture just below.

STEP 2 - heat up a pan then add the coconut oil and allow it to melt into a liquid. Once this has happened add the 2 tablespoons of agave nectar.
STEP 3 - Once the mixture in the pan is lightly covered in the liquid, then add the ground almonds and mix it all together whilst continuing to simmer over a lower heat. This should begin to clump togther, there will be a noticable change in how sturdy the mix is. Once this is mixed in empty the contents into a glass bowl.
THE FILLING
STEP 4 - get a frying pan, add a little coconut oil and heat whilst cutting up your 2 bananas for your filling. You want to heat the pan to gradually get to a temperature where you get a little "sizzle" as you place the banana pieces in.
STEP 5 - Whilst the banana pieces are lightly frying in the coconut oil, go back to your previous mixture that is in the glass bowl. Using a silicone bun tin divide your nut base mixture out so that you have around a cm in the bottom of each bun section. You want the base to be thick as this is what is going to hold everything together. Once this is done place the bun tray into the freezer to allow the base to set.
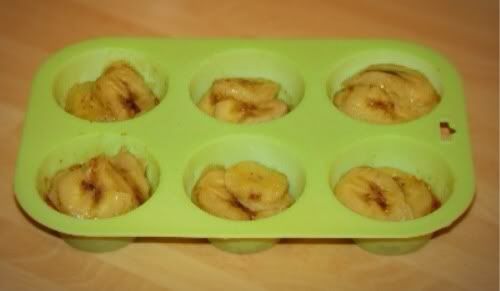
STEP 6 - continue to cook your banana pieces until they appear mushy, literally just holding themselves together.
STEP 7 - by the time that your banana has cooked to the point of being the desired consistency, your base would have set in the freezer. Remove the base and place your nice sloppy banana pieces into the moulds on top of the set bases generously. When you do this put 2/3 pieces of the cooked banana to the side in a dish and we will come back to them shortly.
STEP 8 - place your bases with the banana's in into the fridge.
THE CARAMEL
(This stage was an utter experiment....the caramel is usually made using butter, even in the paleo world, but l wanted to try and avoid it.)
STAGE 9 - into a frying pan, add the 2 tablespoons of agave nectar and the teaspoon of vanilla. Heat this over a gentle flame for a few minutes until it begins to lightly froth or bubble. When this starts to take place chuck in your pieces of banana that you put to the side in the dish and add your 1.5 tablespoons of ground almonds. Get a fork, then whilst mixing in the ground almonds mush the banana down into the mixture, do this until it is literally non existent in the pan and has total blended in with the other ingredients. I left this over the heat, continually mixing with my fork until it became almost foamy and was very light. When it gets to this stage take it off the heat.
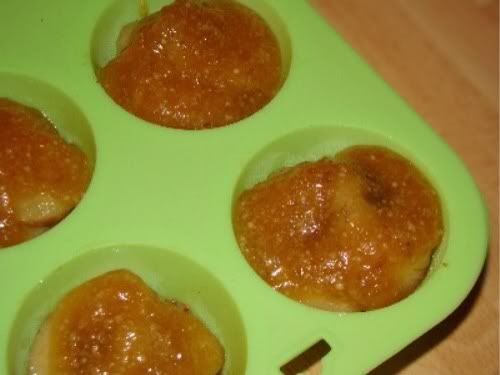
STEP 10 - remove your moulds from the fridge and LOVINGLY add around a teaspoon of the caramel to each of the moulds coating the banana. This is an extremely satisfying stage of the recipe....it...looks...awesome! Once you are happy that you have coated the pieces, place it all into the fridge and leave it for over an hour so that it can set properly. You will know if you have not left this for long enough as the caramel will still be runny, you want it so that its thick so that when you go to pop out each of the tarts they come out intact. Get this right and the caramel that you have made should be the same texture as tarmac in the summer heat!
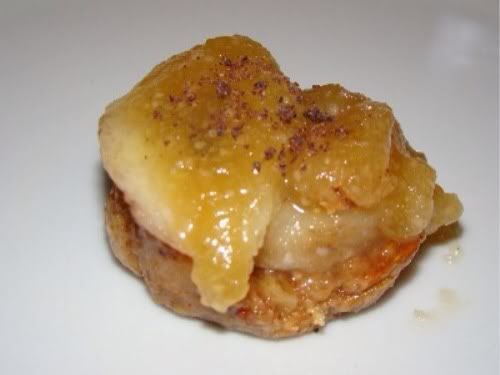
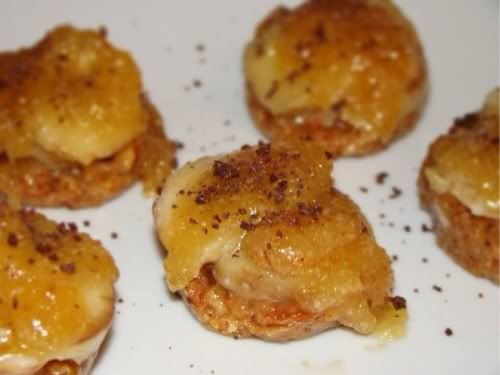
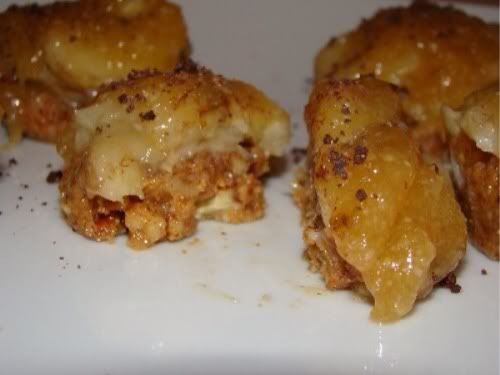
STEP 11 ... tuck in and have a taste!
As you can see mine came out pretty well, decorated with a light sprinkle of grated dark chocolate!
There isnt really any prep time for this recipe, but it does take a few steps, pans and dishes to produce. I would say that this took me about 20-25 mins to create in total from start to finish.
If your a fan of sweet things and follow the Paleo way, this is a MUST recipe for you to try. It combines to make a real sweet dish that satisfied me on many, many levels. I hope you enjoy this....l know that l certainly did.
No comments:
Post a Comment