27 November 2011

SALLYS MEATY BUNS!


This weeks recipe was first offered up by Sally Hatfield (pictured below) Of Crossfit Plymouth. Sally is one of the followers of "Crossfit Plymouth Paleo Exchange" which our members use in order to keep each others inspired with great paleo recipes. This was originally a meatloaf that l have messed around with and added to in order to come up with this version!


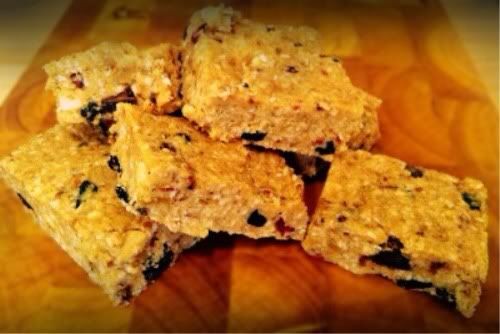
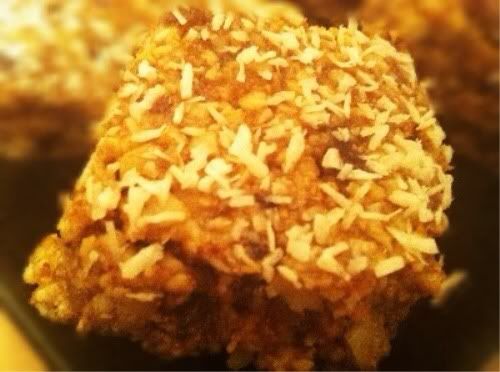
The ingredients stated l find normally produce a medium sized loaf tin and around 12 meaty buns to keep me going! The buns are cracking little additions to a soup or as a side to a nice salad. They are ideal for people on the go as they dont break up like the slices of meatloaf do in transit.

There isnt a video for this weeks recipe folks...its that easy to make!

If you dont want 12 little buns, l have also made 4 larger ones instead in the past. Your then into the sort of size where you could use them to fill with salad for a cracking meat/salad roll on the go.....or as l did in the summer take them to a BBQ with you so your not "the wierd friend not eating bread" and use them as hardcore baps.

The ingredients for a decent amount of this that will keep you going for quite some time are as follows;

2 cups of ground almonds
400g minced turkey breast
Just under 1/2 tin of coconut milk
1 heaped tablespoon of garlic
1 heaped tablespoon of chilli
2 carrots grated
1 parsnip grated
1 egg
1/2 cup of diced mushrooms
1/2 a red pepper
1/2 a diced onion
A handful of spinach
8-10 pieces of sun dried tomato
Italian seasoning
Salt/pepper for seasoning
2 slices of smoked bacon
1/4 cup of mixed seeds

STEP 1 - add a tablespoon of coconut oil to a large saucepan, get the pan to a decent heat then add the chilli, garlic, onion, carrot and parsnip. Leave this in the pan and sautee evenly, turning as often as you can to prevent any burning.

STEP 2 - Whilst STEP 1 is taking place, dice your mushrooms, bacon, sun dried tomato, pepper and spinach. THESE ARE NOT GOING TO BE COOKED, TO BE ADDED RAW
 
STEP 3 - in a large mixing bowl combine your ground almonds with your coconut milk. Your aiming for a thickened mixture.

STEP 4 - once your ingredients from STEP 1 have been completed, allow them to cool for a few minutes. The reason for this is only that you will be combining your ingredients with your hands very shortly.

STEP 5 - add all of your ingredients from STEP 1 and your diced items from STEP 2 to your mix made in STEP 3. Then add your minced turkey. Season with salt, pepper and your italian seasoning and add your egg to bind everything together. Mix it lightly by hand, l have tried making this in a mixer before, it makes it very dense and a bit of a mission to eat!

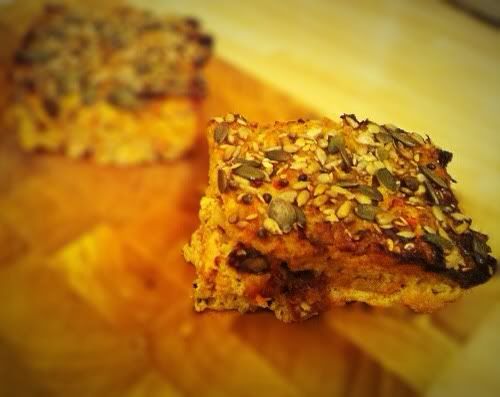
STEP 6 - get your loaf tin and your bun trays and line them with a little melted coconut oil. Brushing this into the moulds is the best method. Divide the mixture out into your loaf tin and then into bun trays as you require. Top the rested mixture with the mixed seeds for a nice crunchy topping.

STEP 7 - place into the oven at 160 degrees centigrade for around 45 - 55 minutes. The rolls obviously take a shorter time to cook, but this is very dependant on the size that you go for. You ideally want to be in a position to check this every 5/10 mins as there is a very close line between cooked and burnt! check with a knife, if the knife comes out of the centre of the loaf clean, you know that it is cooked through. Any sloppy ingredients on the knife indicate that it needs longer.


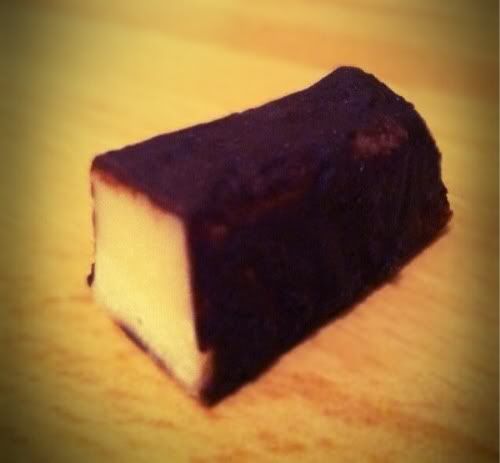
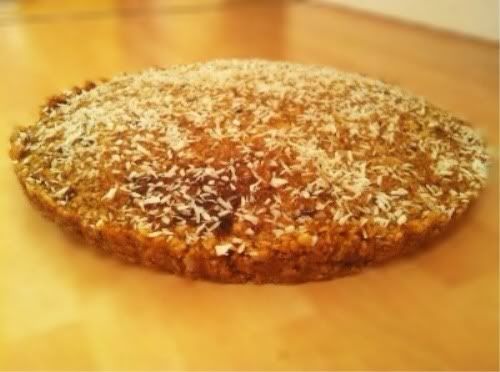
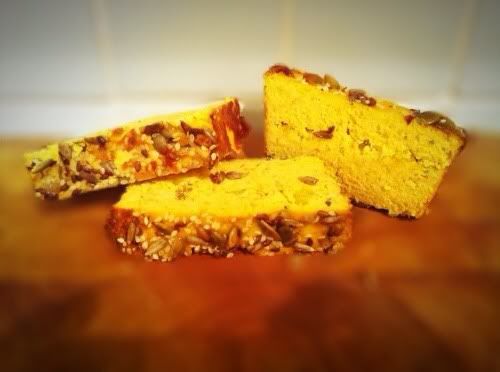
STEP 8 - Once your satisfied that it is cooked l recommend leaving the loaf to rest for a little while before cutting it. There is nothing wrong with removing it from the tin at this point though. Ideally leave it to cool down completely at room temperature before placing into the fridge. I have made the mistake of cutting this straight away before, it just crumbles and doesnt hold together...Give it a little time, its worth the wait. The beauty of the meaty rolls is that they dont need that time. They are easier to eat and dont break up.

STEP 9 - tuck in and enjoy!

As you can see my batch came out pretty well!


This recipe fits in really well with a busy person who is trying to fit paleo in. It requires little preparation and lasts you for days. If your looking to start out on paleo, its also one l would recommend that you do to make those first few days meals a bit easier for you.

21 November 2011

PALEO CHICKEN, BACON AND VEGETABLE SOUP


This is a right winter warmer for you guys! Made this recipe up about a month ago now and have done a further 3 batches since, l simply cant get enough of it!!!

Its a really versatile dish that l have had for breakfast/dinner/tea and as a snack in a smaller portion. This is the kind of recipe that makes paleo food EASY whilst being nutritious and ticking all of the boxes.

For those that need it or would like a simple video walk through of the recipe you can find it by clicking here

The ingredients for a decent amount of paleo soup that will keep you going for quite some time are as follows;

1/2 litre of chicken stock
6 parsnips - STEAMED/BOILED until soft prior to using in this soup
4 carrots - STEAMED/BOILED until soft prior to using in this soup
1 onion
1 large floret of broccoli - STEAMED/BOILED prior to using in this soup
2 pieces of smoked bacon, diced
1 heaped teaspoon of garlic
1 heaped teaspoon of chilli
A handful of cooked chicken, again diced
Italian mixed herbs
Sea salt
Pepper

OPTIONAL - Mushrooms, roughly diced peppers, sun dried tomatoes, spinach 
(put them into a bowl, 3/4 fill and this will then make up your "chunky texture" elements of the soup)

This recipe has an element that you need to prepare in advance prior to STAGE 1, this being the chicken stock. 

* Coincide this with a paleo meal using a whole chicken and strip the carcuss of the meat. 
* Once this has been done put the left over carcuss and any skin into a large pan. 
* Add boiling water to the pan until it just covers the height of the bones. 
* Leave this to boil, once it has, simmer on a lower heat for 2/3 hours until you are left with a cloudy liquid. 
* Pass the liquid through a seive leaving you with a liquid which is your stock for your soup!

STEP 1 - Figure out which chunky ingredients you would like and put them in a bowl.

STEP 2 - Using a half teaspoon of coconut oil in a hot pan, begin to cook the diced onion with the garlic and chilli, pour in your bowl of mixed chunky ingredients and cook with the bacon.

STEP 3 - Get your steamed/boiled parsnips, carrots and broccoli ready to add to the food processor to make up the main body of the soup...with this keep a few pieces of each back and place into a cup so that it is around half full. We will add this to the soup when mixing it all together with the other texture ingredients to add a nice, different vegetable dimension to it.

STEP 4 - start to add your steamed vegetable to your food processor, you may find that you cant fit all of this in at once. Blend the vegetables down until they are like a thick paste. When the level of mixture in the processor lowers, add more vegetables that you have steamed to it and blend until it is all in and of the same consistency.

STEP 5 - as you continue to blend the vegetables down in the food processor, begin to pour in your COLD chicken stock that you have already prepared and allowed to cool. Add 1/4 of your chicken stock to begin with and again blend.

STEP 6 - keep adding your chicken stock until you get the desired consistency....l did all of it and was still left a nice thick soup! If you find that you have vegetables on the top that are not mixing with the rest of the mixture, press them down into the mixture with a fork and pulse again. Add salt, pepper and mixed herbs to taste.

STEP 7 - pour your current mix from the food processor into a large mixing bowl and add the cooked ingredients from your pan. Mix all of this together with a wooden spoon, adding any leftover stock as you go. Dont forget to put in your diced vegetable from the cup that you have put to the side as mentioned in STEP 3 too, along with your diced chicken pieces.

STEP 8....Heat, then tuck in and have a taste!

Prep time is around 15 mins when it comes to making the soup. With this bear in mind that the chicken stock takes 2/3 hours and if you choose to steam your vegetables this takes about 45 mins too.

There is only one thing better than chicken, bacon and vegetable soup.....and thats chicken, bacon and vegetable soup with "Sallys Meaty Buns" ....they will be coming to you next week along with their Meatloaf big brother!

13 November 2011

PRIMAL PEPPERMINT BARS


This recipe was a new one for me...and l was very pleasantly surprised by the flavour that it delivered. For me, l always try to have paleo based treats that come close to "normal" treats that l miss. This is now amoung them, adapted from Kristin Jekieleks recipe at FAST PALEO.

Ill be honest, l love after eight mints. When Christmas comes each year you can easily sign me up for a few boxes of them and ill happliy tuck in, they are one of the things that l miss through paleo...this peppermint recipe has now solved that issue for me.

For this recipe you can form the "patties" however you want, l found the suggested Jaffa cake size patty a bit big, so l have made mine into bars. Snack size, just enough and a good sweet fix!

For those of that need it or would like a simple walk through of the recipe you can find it by clicking HERE or by visiting the VIDEO BAR on the right of this page. Please note that this recipe is split into 2 videos, one for the interior peppermint preparation, another for the chocolate coating.

The ingredients for these, that made me 9 bars are as follows;

1/2 cup of coconut oil
1/2 cup of coconut butter
1/4 cup of Agave nectar
1 teaspoon of peppermint oil
100g bar of 85% dark chocolate

STEP 1 - measure out your coconut oil and coconut butter. Put them together, into a cup and into the microwave for around a minute and a half.

STEP 2 - during STEP 1, measure out your Agave Nectar and peppermint oil and combine in a glass bowl....add a few extra drops of peppermint oil for a little extra minty kick if required.

STEP 3 - once you are happy that the coconut butter/oil is broken down and in a liquid state pour it into the bowl containing the other ingredients and mix in with a whisk until the mix thickens.

STEP 4 - pour your mix into moulds/onto a flat tray depending on what form you would like the peppermint to take. I would suggest trying the recipe with a silicone ice cube/bar tray as the next stage may get a little tricky if you have a tray full of thin flat mix. You could also put some into a bun tray to take shape if that helps.

STEP 5 - place into the freezer for 60-90 mins until the mixture has hardened.

Prep time is around 10 mins up to this point. When you remove the bars from the freezer to check they have set, If the mixture breaks off into bits or crumbles you know it hasnt been given long enough. If thats the case pop it back in the freezer for a while. If your in no rush, overnight, or in the morning to complete the 2nd stage of the recipe may be a good idea.

STEP 6 - remove your set peppermint bars from the freezer, pop out of the moulds with some care and place onto a silicone sheet or some greaseproof paper. If you have any trouble getting the formed peppermint out of the moulds, just get a knife with a warmed blade and cut around the edges and they should drop out.

They should look something like these bad boys


Now comes the messy part...For those of that need it or would like a simple walk through of this stage of the recipe you can find it by clicking HERE or by visiting the VIDEO BAR on the right of this page.

STEP 7 - have a few inches of boiling water in a saucepan, place a glass boil that just fits into the top of the saucepan on top. The idea of this is that there is a cavity between the boiling water and the glass bowl so that we are using steam to melt your chocolate. Now break your bar of chocolate into small pieces and place it into the glass bowl.

STEP 8 - stir/move your chocolate around in the bowl and you should see that it is beginning to melt. Whilst avoiding the temptation of dipping your face into the bowl take a pastry brush and brush the exterior of your peppermint bars with the melted dark chocolate. I found it best to get a base layer of chocolate on first, then dab the top of the bars so that some chocolate runs down the side coating further.....l was dribbling Iike Homer Simpson on that part!

STEP 9 - when you have happily coated the peppermint bar. If you like you can either apply a little choc to the bottom by picking it up with a cocktail stick or you can freeze what you have and add the bottom chocolate once that has set.

STEP 10 - put the bars back in the freezer/fridge for 10-15 mins until the chocolate has settled and formed a nice coating.

STEP 11 ... Tuck in and have a taste!

As you can see my batch came out pretty well...


Found this a great little recipe. The peppermint gives you a cracking treat rather than something that is made from all nuts or fruit. It brings something a bit different to the table. I ended up cutting my bars into slices, putting them into a freezer bag and have some through the day like a pick n mix treat. 

SAMPLE BAGS AVAILABLE FOR THIS RECIPE!

07 November 2011

ALMOND BUTTER SLABS!


Welcome to my 1st blog recipe for PRIMAL PROVENANCE...

To start things off with a "big bang" l've gone for a recipe thats similar to one that is very close to my heart...Almond butter slabs! This recipe is a must for any paleo fan who likes nuts and has a sweet tooth like me.

For those that need it or would like a simple video walk through of the recipe you can find it by clicking here

The ingredients for a decent amount of almond butter slabs/bites/bars that will keep you going for quite some time are as follows;

1/2 cup of almond butter
1/2 cup of almond flour (ground almonds will suffice)
1/2 cup of coconut oil
2 cups of mixed nuts of your choice
1/2 cup of dessicated coconut
1/4 cup agave nectar (in any supermarket or health food supplier, a few £)
2 tsps of natural vanilla flavoring (check contents to make sure it is what is says!)
1 cup of unsweetened mixed dried fruit, l've gone for dates, apricots, pears & prunes
OPTIONAL - any toppings you would like to add, dark choc etc

STEP 1 - measure out the mixed nuts, coconut and dried fruit with the almond flour/ground almonds. Add all of these to your food processor and blend until they leave a coarse dry mixture.

STEP 2 - measure out the almond butter and the coconut oil, place into a container and microwave for 40 - 60 seconds until the coconut oil has melted and the consistency of the almond butter is more liquid like.

STEP 3 - measure out your Agave nectar and vanilla, pour these into your container with the melted coconut oil/almond butter in and mix together until they blend into one.

STEP 4 - add the mixture from STEP 3 to the dry mixture from STEP 1. Mix both of these together by hand with a wooden spoon or a spatula.

STEP 5 - once mixed place into your tin, if you have one use one with a removable bottom to help get the solid finished product out after it has set in the fridge.

STEP 6 - place the finished mixture into the fridge for 60-90 mins

STEP 7 ... Tuck in and have a taste!

Prep time is around 15 mins, the mixture takes around 60-90 minutes to set to a reasonably firm block in the fridge. The tester is when you cut it, the knife should cut through easily and leave a clean edge. If the mixture breaks off into bits or crumbles you know it hasnt been given long enough to set.

As you can see my batch came out pretty well...


Once you have it set, you can either have it in larger pieces, fingers, small cubes....whatever fits with you.

I went true to the recipe myself and stuck with slabs!


These make a cracking paleo treat. The only thing wrong with this recipe...is that you find yourself popping back to the fridge for more!